Terratec Grabby Conexant II
Installation Guide
With this Driver installation guide, you will be able to install the Terratec Grabby Conexant II Video Grabber on your own.
The options you have are basically two. Either you can do a clean driver installation for Terratec Grabby Conexant II or you can reinstall the driver update software in case that ICON Print doesn’t receive the live image from the medical device.
Driver Installation
Option 1. For a clean installation refer to Begin clean installation. (See the next section)
Option 2. If there is a problem with the live image in the ICON Print application, you must first check how Windows recognizes the driver of Terratec Grabby Conexant II.
- On your desktop, you must right click on Computer icon (windows 7) or This PC icon (windows10), choose Manage and then Device Manager.
- If “This PC” icon is disabled, you can right click on Windows 10, “Start” button and select Device Manager.
- Expand the Sound video and game controllers and check if there is the USB2.0 Video Capture. If it is not, there must be three options:
- Terratec Grabby >> for this option to reinstall the driver update software, you must refer to the Driver update software for Windows x86 and x64 section on Begin a clean installation.
- Video Grabber >> for this option to reinstall the driver update software, you must refer to the Driver update software for Windows x86 and x64 section on Begin a clean installation.
- Video Grabber with an exclamation mark (!) (warning) >> for this option you must Begin a clean installation.
Useful Tip: If you want to download Terratec Grabby Conexant, visit our Downloads page, find Terratec Grabby Conexant and download it. 
Begin a Clean Installation
NOTE: The driver wizard is in German, but there is no problem installing it since there are only 5 simple steps.
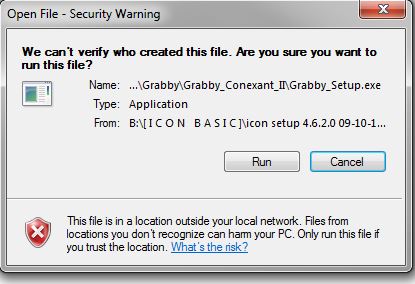
Step 1. Run “Grabby_Setup.exe”.
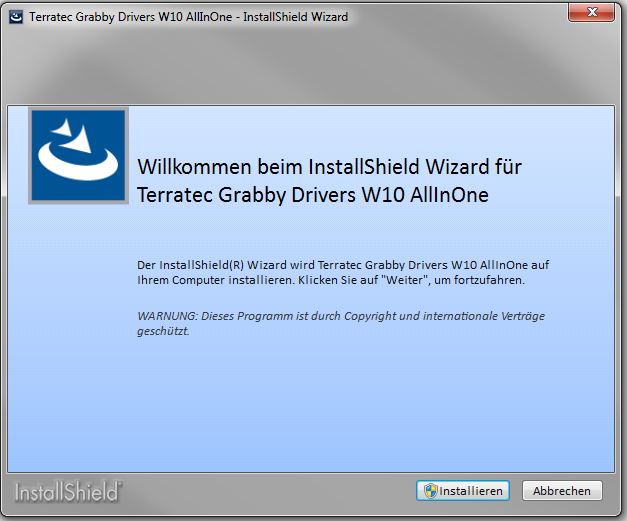
Step 2. Click on “Installieren”.
Step 3. While the driver is being installed, a popup window will appear.
Check “Always trust software from “Ultron AG” and then click “Install”.
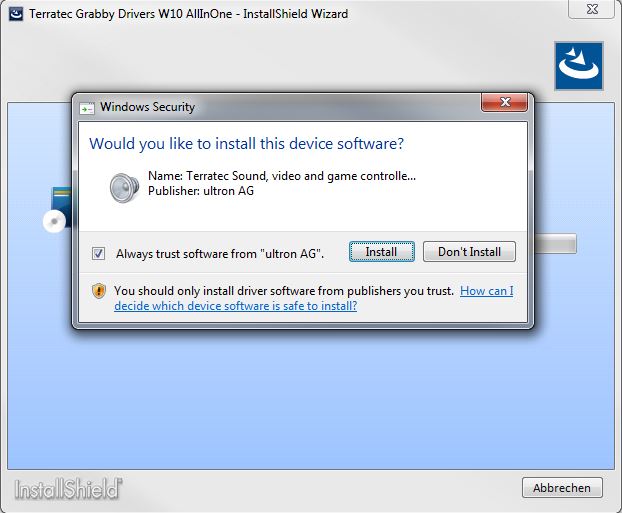
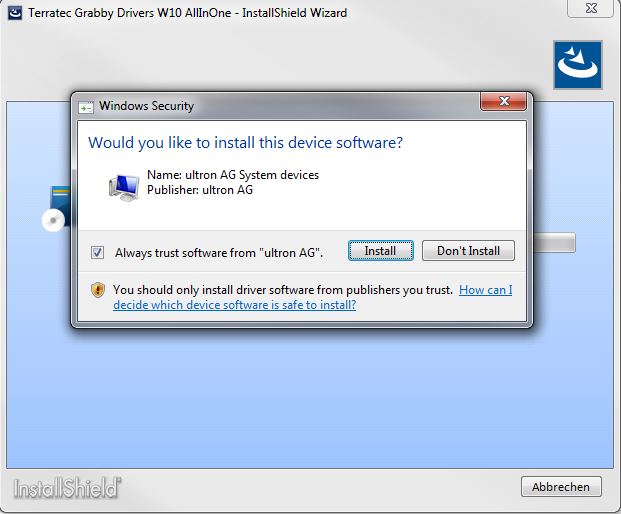
Step 4. If a next popup window appears then do the same as at Step 3.
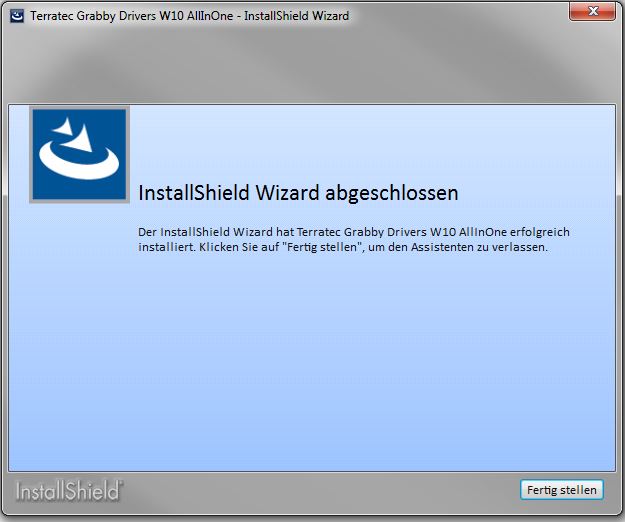
Step 5. Click on “Fertig stellen” and now the driver has been installed correctly.
IMPORTANT NOTE:
The Terratec driver is not compatible with the ICON Print application, that’s why you will need an updated driver software to resolve compatibility issues that may occur. To have a complete installation of the Grabby Conexant II driver, you must continue with the following section: Driver update software for Windows x86 and x64.
Driver update software for Windows X86 and X64
Step1: First you must go to your Desktop and right click on Computer icon (windows 7) or This PC icon (windows10), then choose Manage and then Device Manager.
- If “This PC” icon is disabled, you can right click on the Windows 10 “Start” button and select Device Manager.
Step 2: On Device Manager expand Sound video and game controllers, right click on Terratec Grabby or Video Grabber and choose “Update Driver Software”.
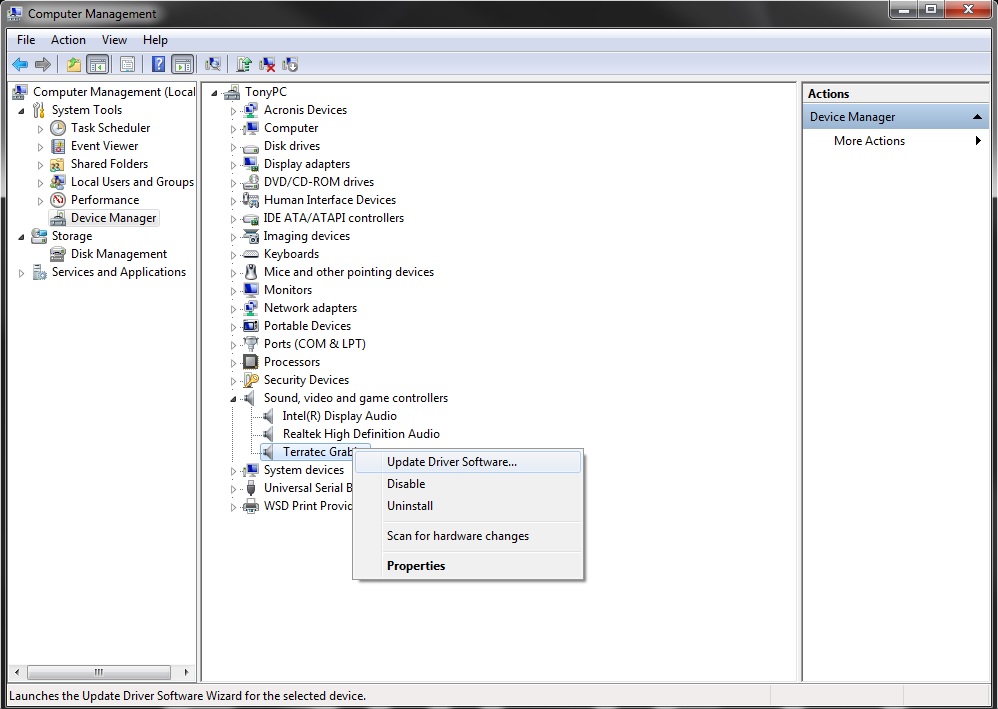
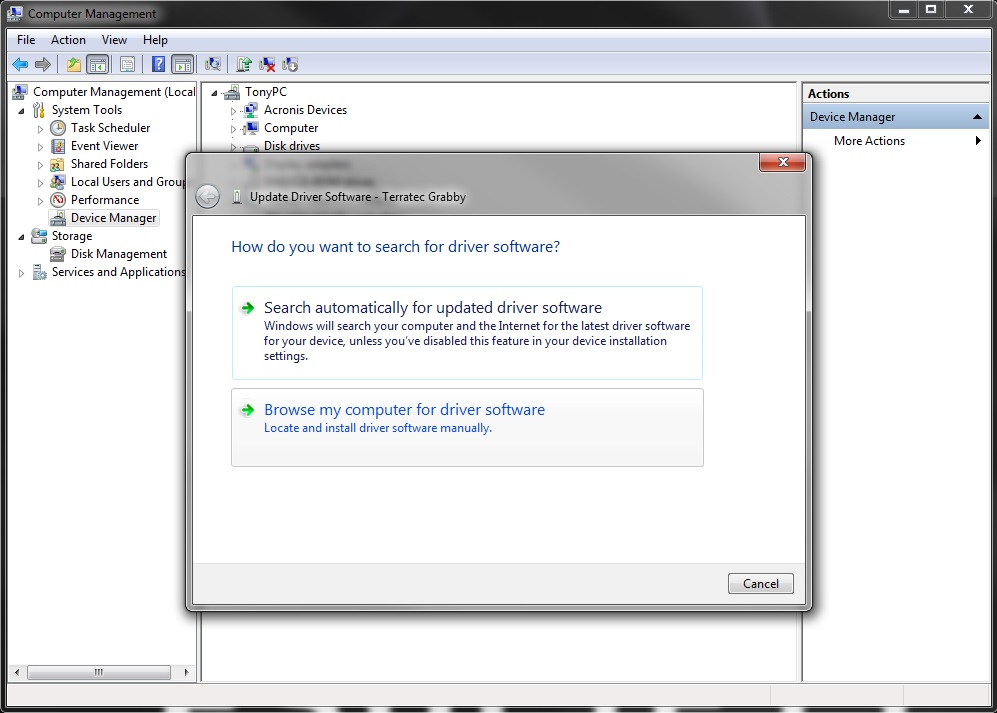
Step 3: Choose “Browse my computer for driver software”.
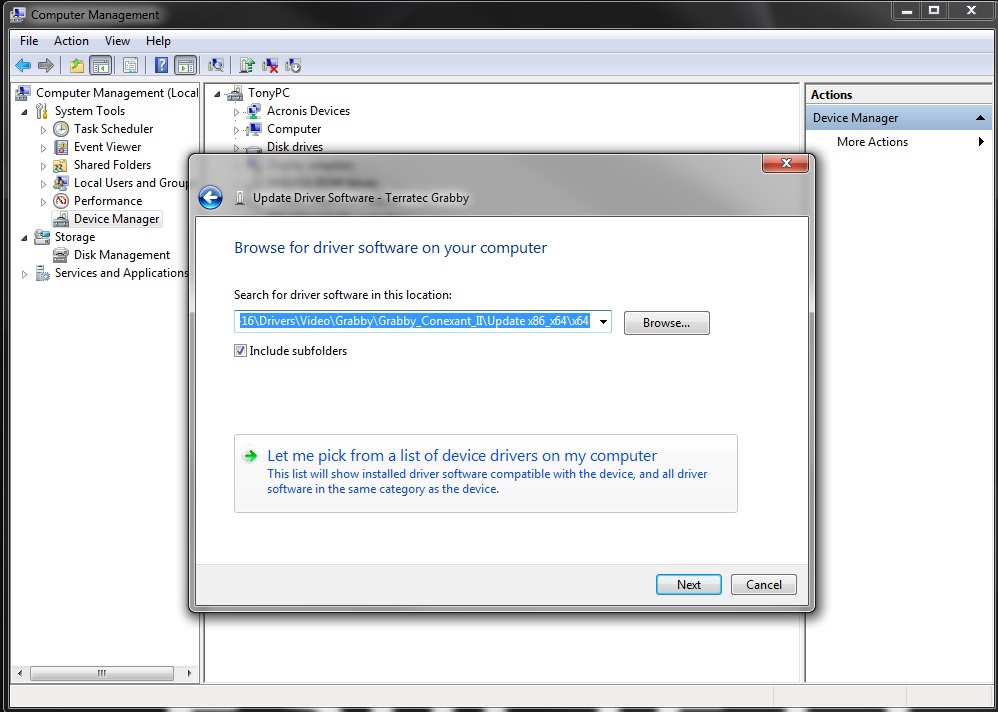
Continue on Step 3: Choose “Let me pick from a list of device drivers on my computer”
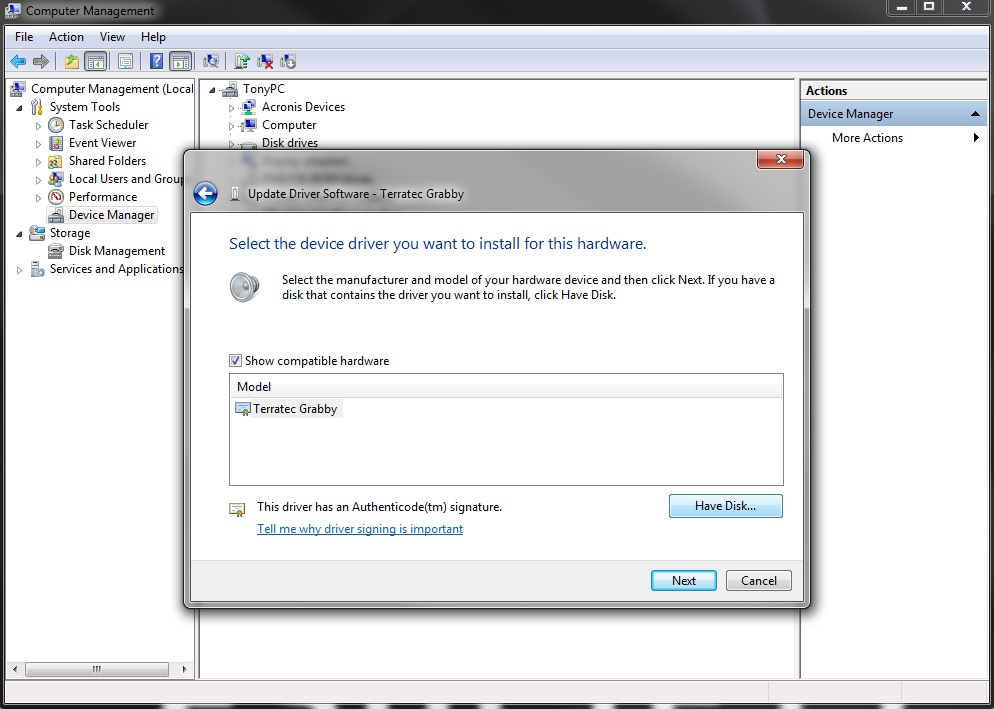
Step 4: Click “Have Disk…”
Step 5: Click on “Browse”.
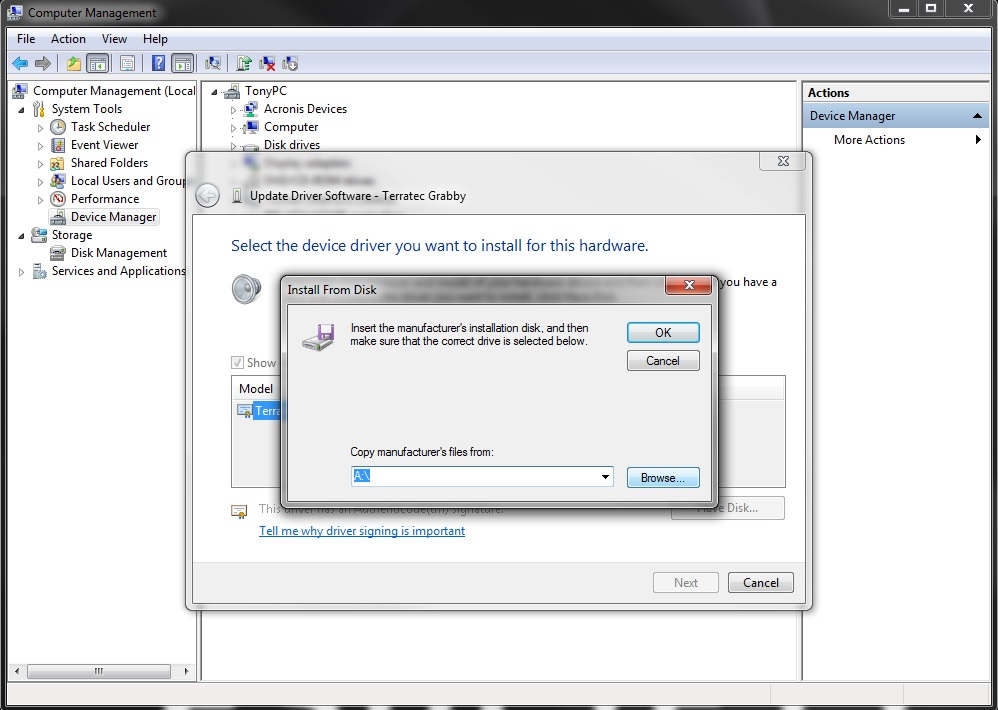
Step 6: Navigate to \Drivers\Video\Grabby\Grabby_Conexant_II\Update x86_x64\ directory of the ICON Print installation disk and choose x64 or x86 based on your Windows Operating System. Click on CxPlrCap.inf file and then click “open”.
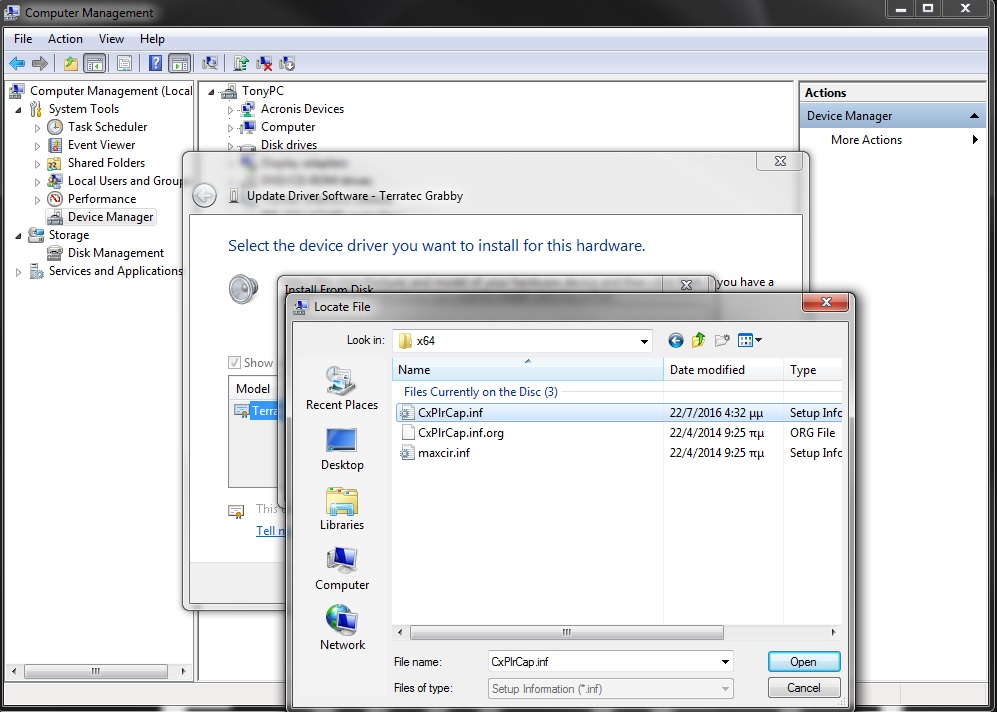
Step 7: Click “OK”
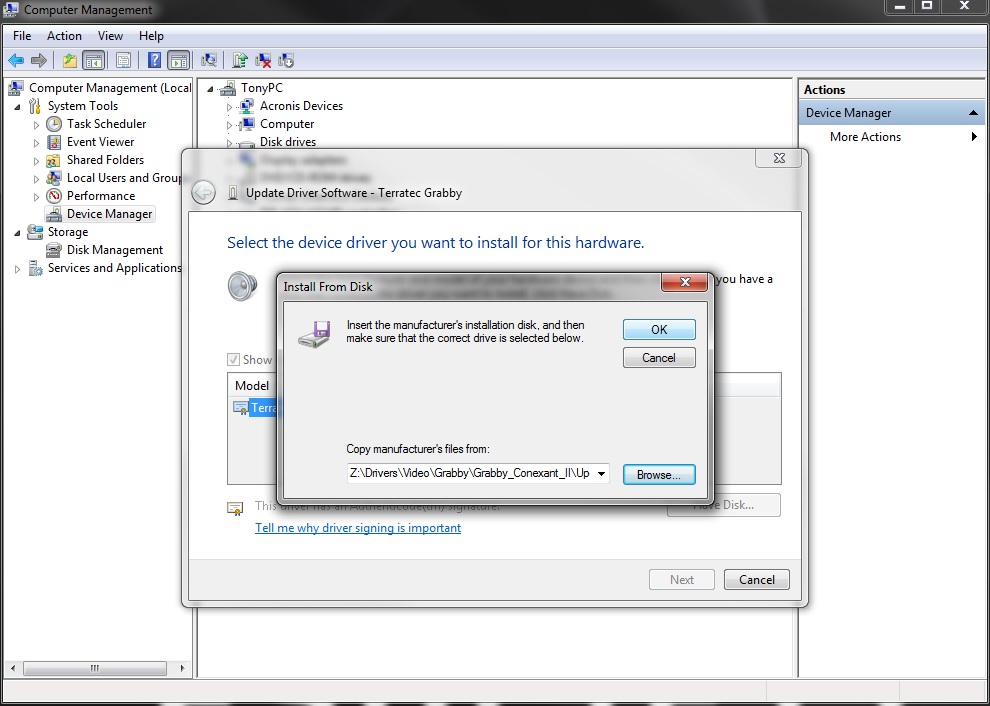
Step 8: Choose “USB2.0 Video Capture” option and click “Next”.
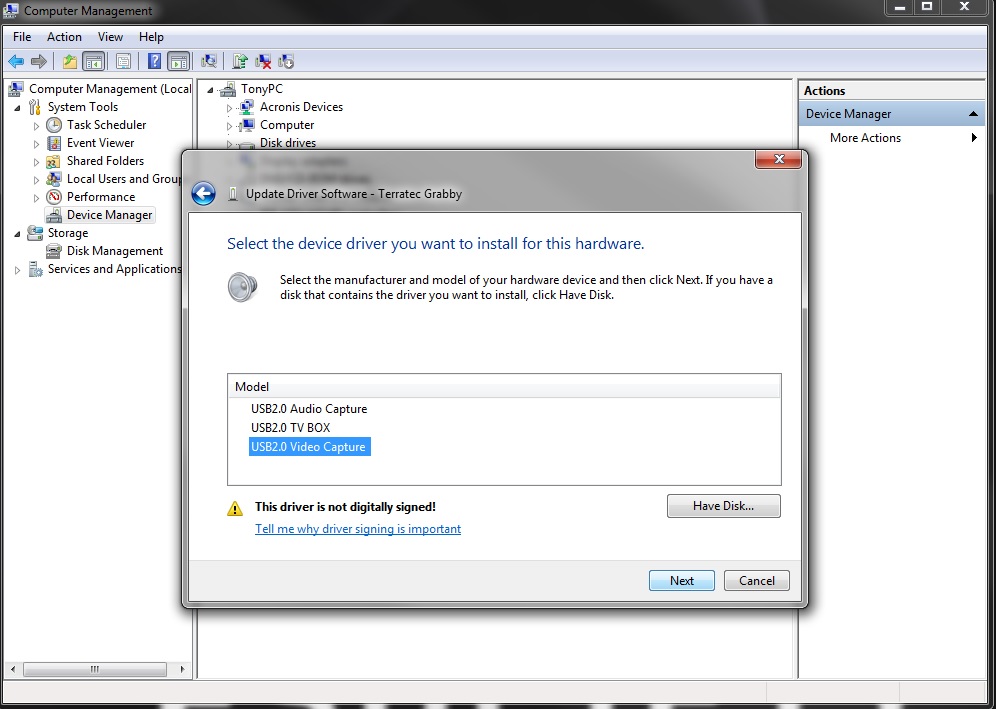
Step 9: Click “Yes” on the warning popup window that appears.
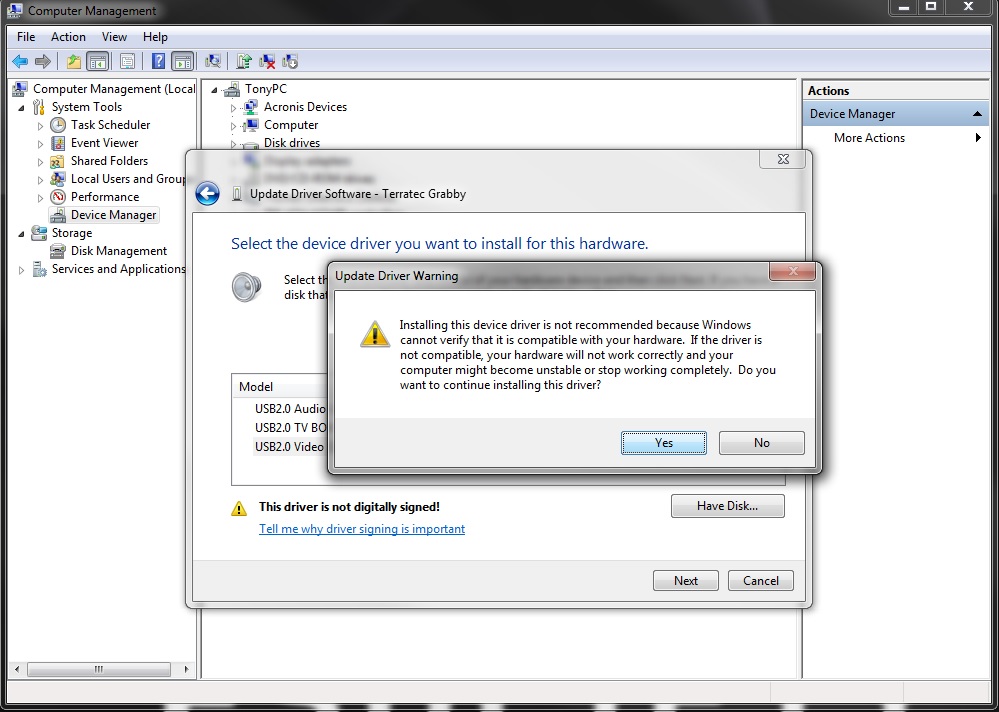
Step 10: Windows may popup a Windows Security window for verification of the publisher of this driver update software. Click on “Install this driver software anyway”.
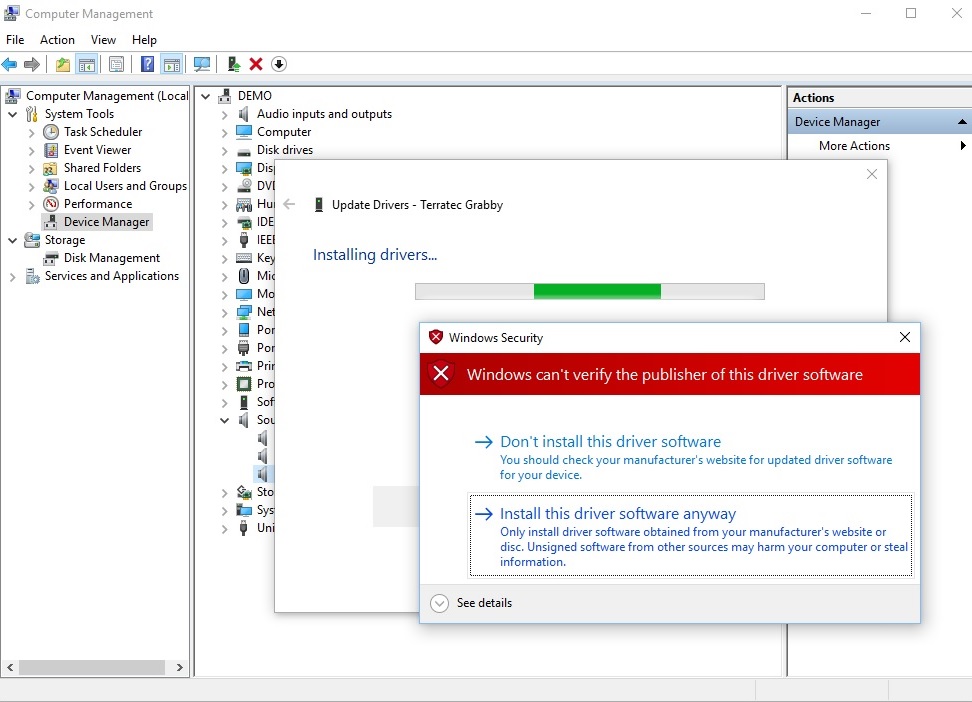
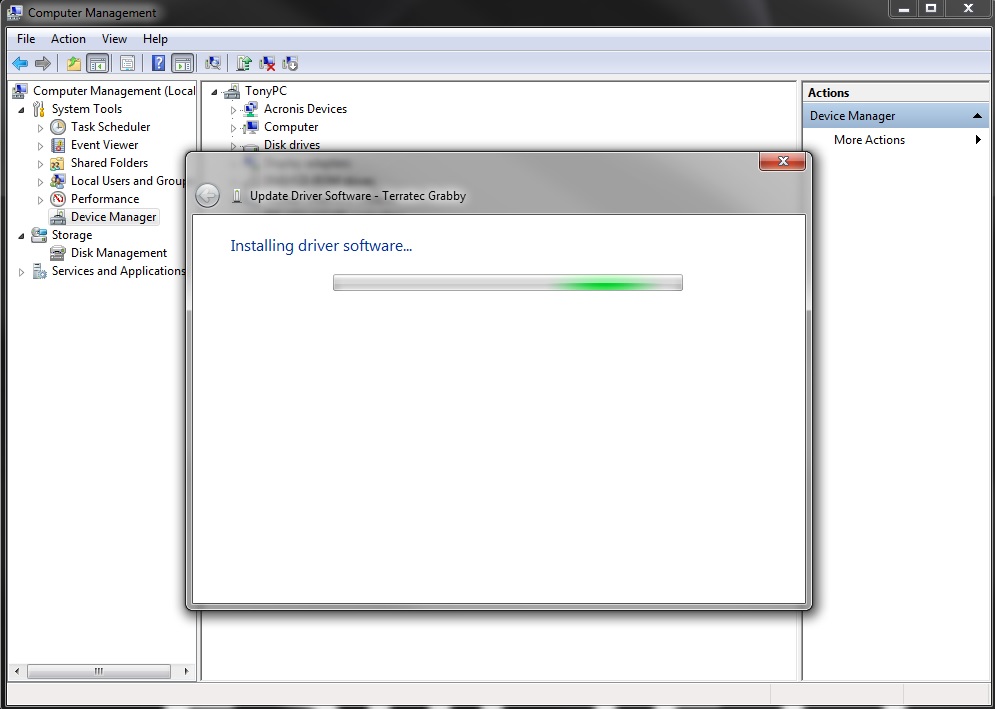
Step 11: Windows installing the driver update software.
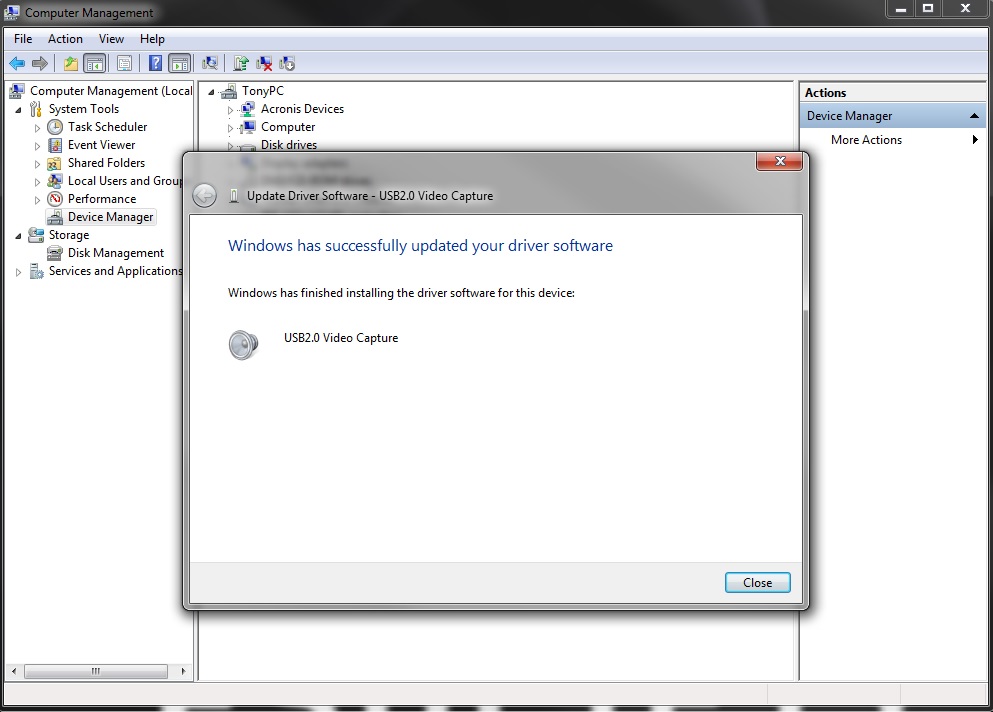
Step 12: The update has been installed successfully.
ATTENTION!
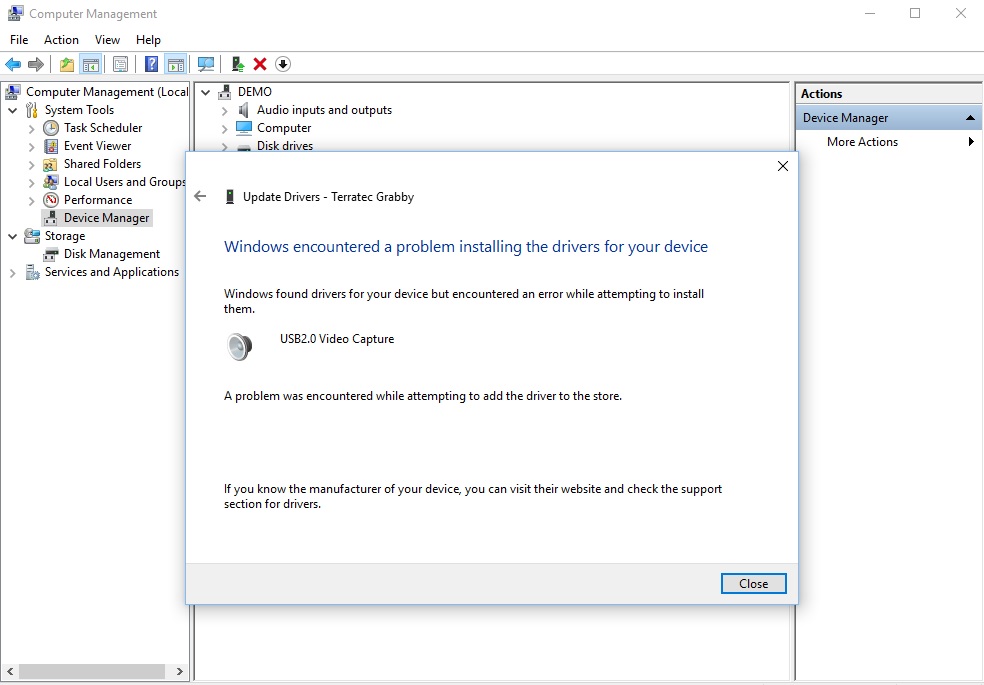
If the message that you get after the driver update software installation is different than the message that we show you on Step 12 and is along the lines of “A Problem was encountered while attempting to add the driver to the store” then you must refer For Windows 10 only section.
- [ Return to the section above and start over again>>>> Driver update software for Windows X86 and X64
Step1: First you must go to your Desktop and right click on Computer icon (windows 7) or This PC icon (windows10), then choose Manage and then Device Manager… ]
See the image below for example:
For Windows 10 only
There might be a problem in the driver update software installation, because Windows 10 may find this drive unsigned. The problem will be resolved by disabling the driver signature enforcement.
To do this, you must follow the steps below.
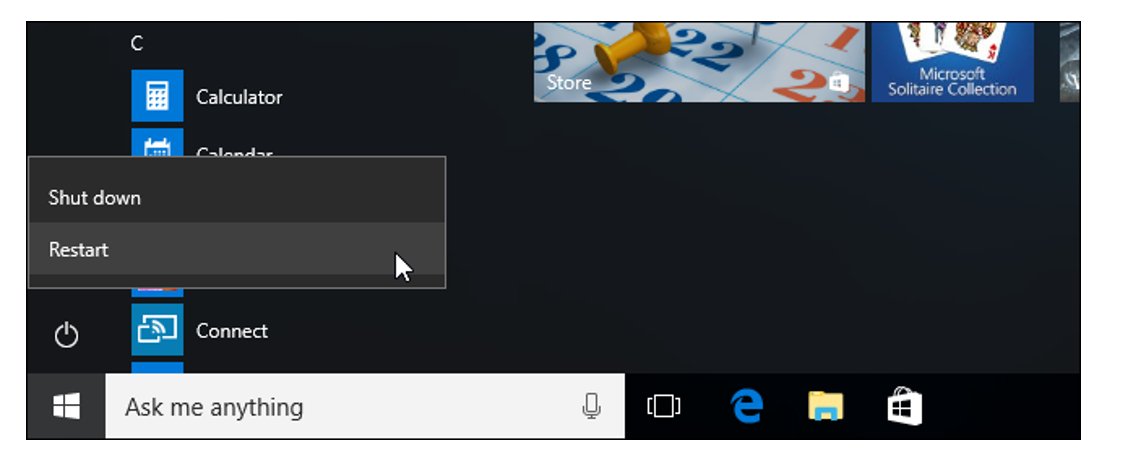
Step 1: You can hold down the left Shift key while you click the “Restart” option in Windows. Your computer will restart into the menu.
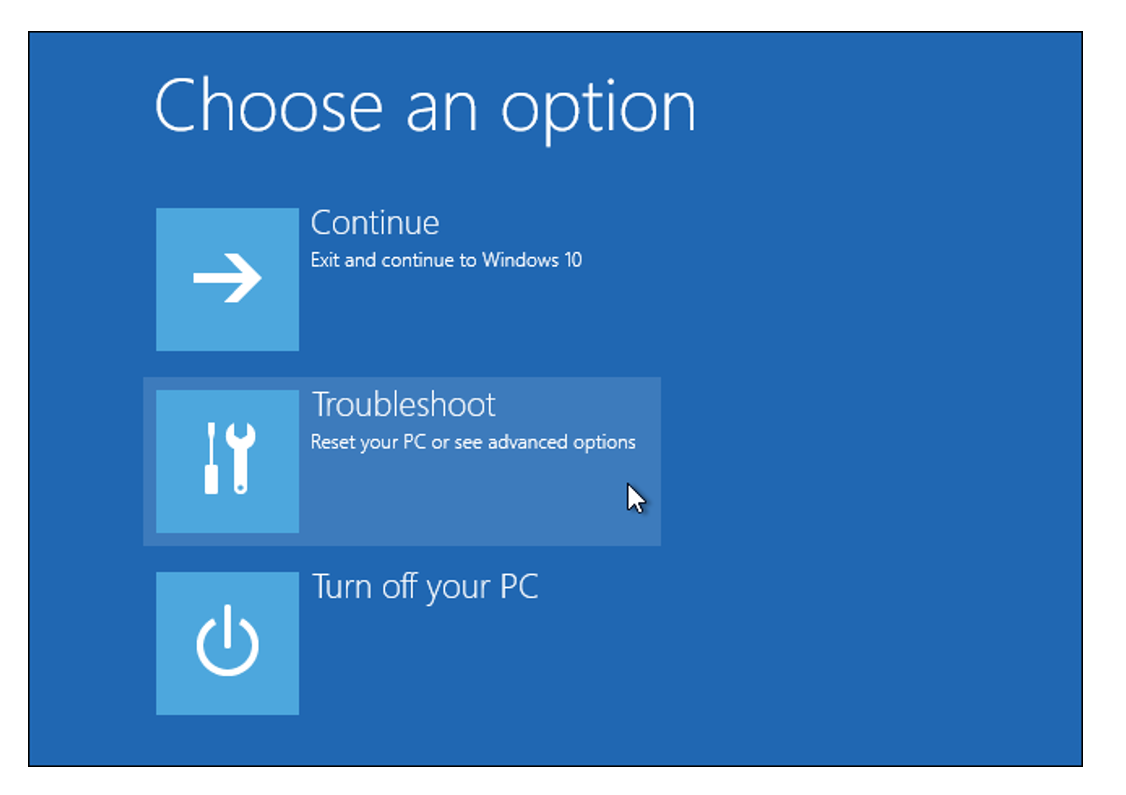
Step 2: Select the “Troubleshoot” tile on the Choose an option screen that appears.
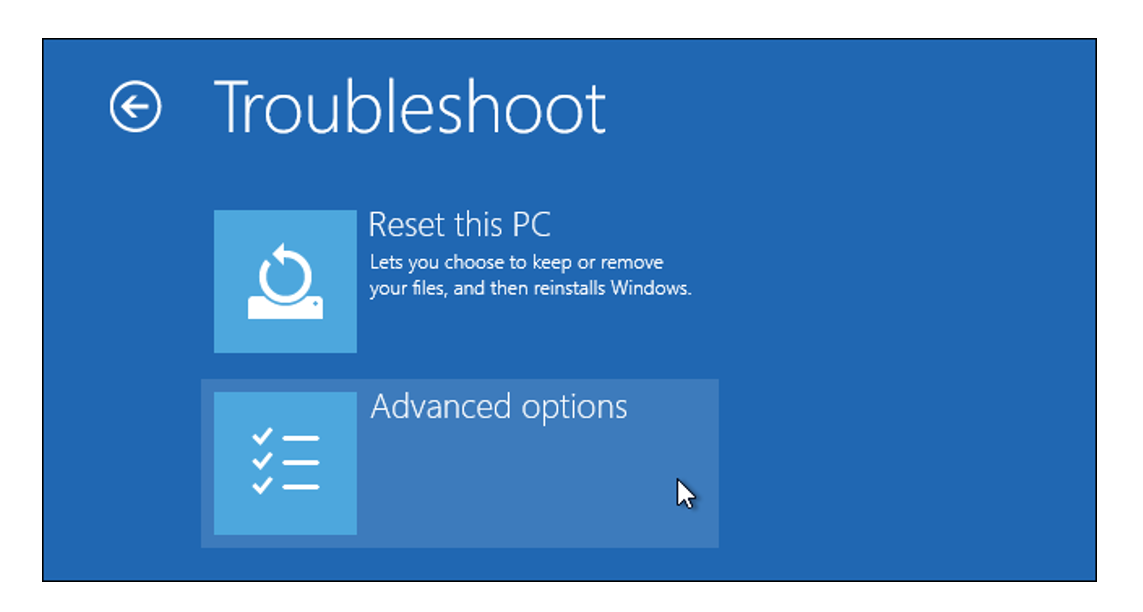
Step 3: Select “Advanced options”.
Step 4: Click the “Startup Settings” tile.
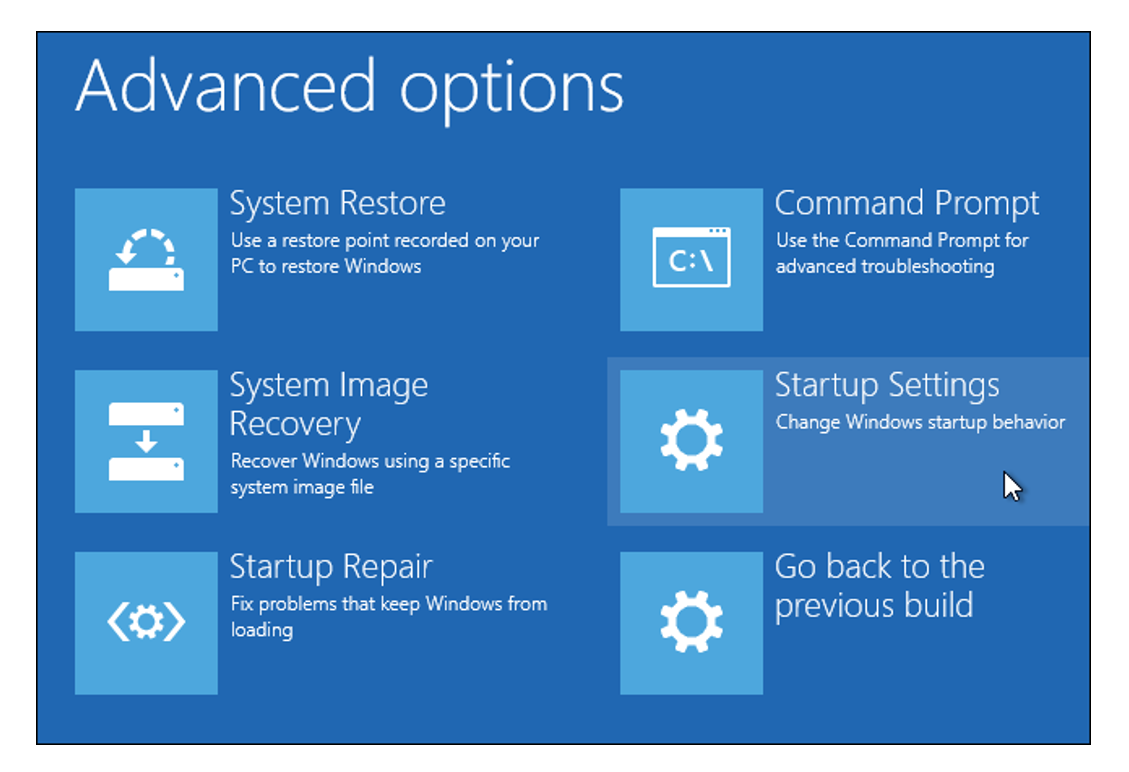
Step 5: Click the “Restart” button to restart your PC into the Startup Settings screen.
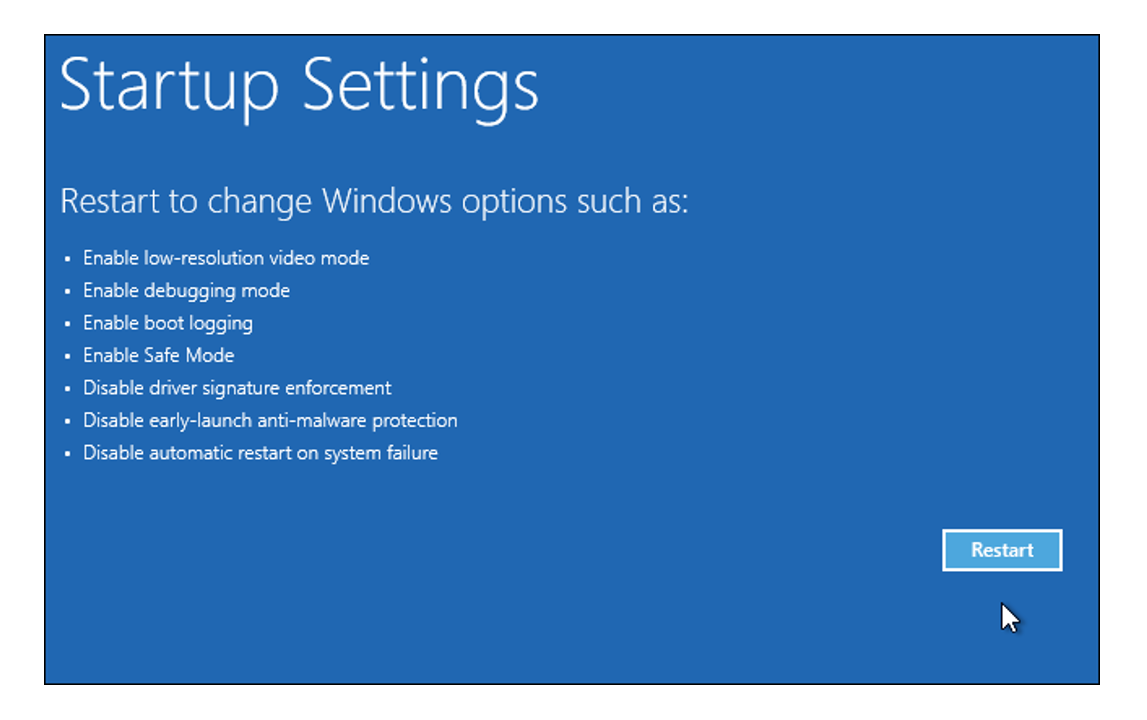
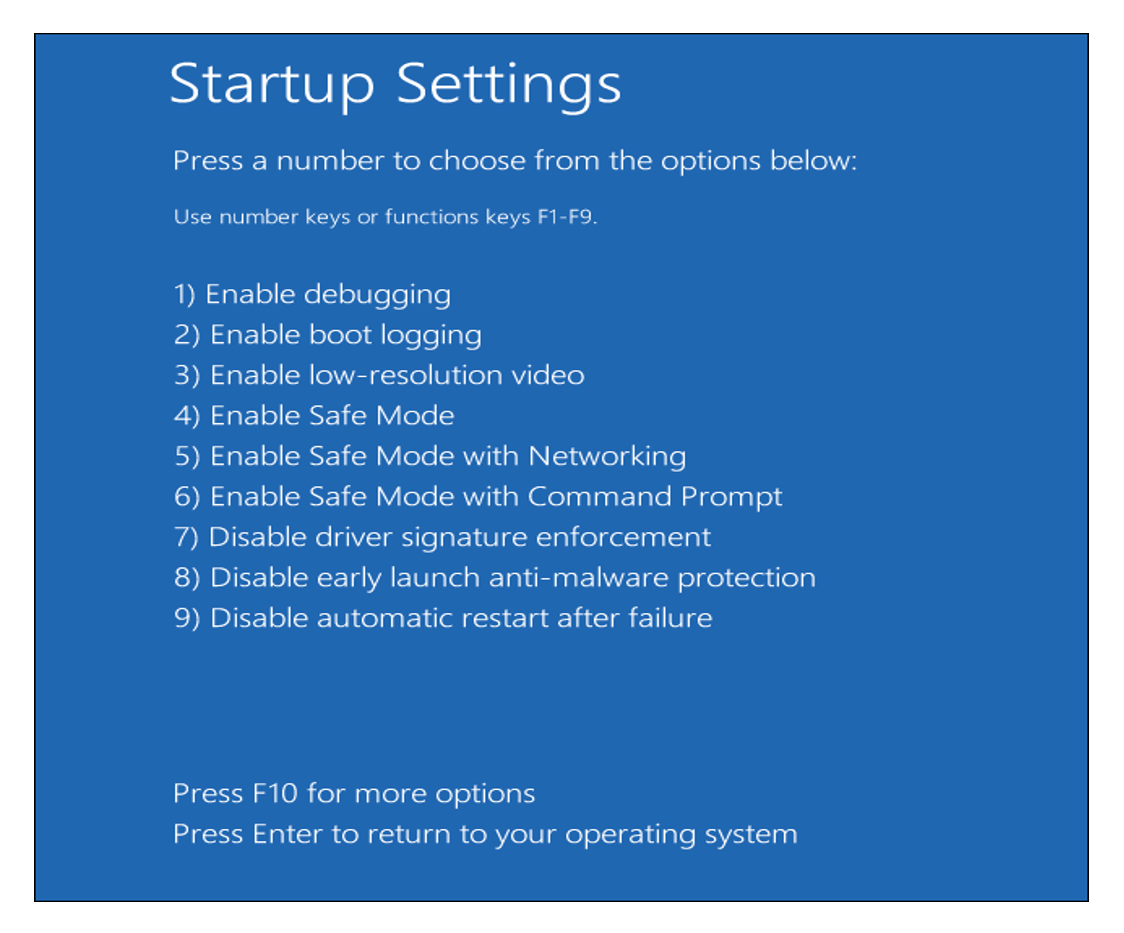
Step 6: Type “7” or “F7” at the Startup Settings screen to activate the “Disable driver signature enforcement” option.
Grafimedia Health IT Experts
At Grafimedia we are a net of Health Information Technology SaaS Experts, operating in different countries. We analyze, design, develop and implement workflows for any kind and size of a healthcare facility.
Grafimedia SaaS Health IT team approaches each case individually, trying to integrate and bridge existing systems, not necessarily replace them. At the same time, we provide the best cost/performance ratio, without exceeding budgets. Feel free to contact us for any further information.

